Showing posts with label Make Do and Mend. Show all posts

Tuesday, March 19, 2013

Passion to Refashion


As part of my goal to purge every room in my house by next month, I recently took on my closet which was stuffed full of stuff that I wasn't wearing because it was too big or I just wasn't that into it.  I filled two huge Rubbermaid containers with clothes that are fine except for one or two tweaks.  For example, this navy pencil skirt was a pair of wide-leg shorts until I cut them open.  Straight seams down the front and pack and I have a skirt with pockets!


I bought two of these very light-weight cotton shirts in January 2010.  The other got a basic redo - taken in, sleeves shortened - but this was a little more in depth.  I wanted a shirt that was more casual, so I picked the stitches out of the collar to remove it. Then I took in the sides by a few inches and the arms by about an inch and cut the bottom hem straight across to give a more finished edge without having to tuck it in (bonus!).


I still wanted a shorter sleeve but I decided to add a little bit of interest by cutting off the shirt cuffs and rolling up the sleeves.  I went ahead and tacked them in place to make sure everything was secure and used the cuffs to create tabs.  They are just decorative, but I still really like this detail.


In addition to gaining tons of closet space, I organized my jewelry with this simple frame and chickenwire jewelry hanger.  My mom and I found these two frames at the Habitat Restore (look for one in your town - great prices on all sorts of construction and home goods and the proceeds benefit Habitat for Humanity!).  I painted them this bright blue and had a custom mirror cut for just $7 (please ignore the smudges).  I love the splash of color on my beige walls in my dark bedroom and I am wearing necklaces I had forgotten I even had.  I love getting organized.

Monday, November 21, 2011

IKEA Hack: Fjellse Trundle Bed


This is probably the thing I made recently that I am most proud of (thus the many photos).  I had been searching for a trundle for a while.  Our second bedroom was an office and music studio already so there wasn't much room for a guest bed.  Unfortunately, it was $500 for anything that didn't look like it was going to fall apart the first time that someone slept on it.  So what's a girl on a budget to do?  Make one yourself, obviously.

IKEA run!!!!!!!!!!!!  You will need two Fjellse twin beds and two sets of Sultan Lade twin bed slats (plus whatever else you convince yourself you "need" at IKEA).


Get your mom to help you assemble both headboards.  Get my mom if you can - she's awesome at this stuff.  The Fjellse beds are low to the ground so to make room for the trundle underneath the main bed, the crosspieces need to attach higher on the headboards.


My very clever mom suggested that we use the available holes to make a template in a piece of paper (the instructions).  Align the template for the bottom hole with top hole on the hadboard and drill two new holes (for a total of 5 holes).  Then attach the bed rails to the two headboards using the top three holes.  The fit of my trundle is really tight so you may want to attach the bed rails a bit higher if your mattress is plush.


Put the slats in and take a break - the hard part is over........................................................okay, back to work.


Cut two inches off of each of the remaining long bed rails.  Flip them over and screw in the cross pieces that belong to the foot boards.  Position then about a third of the way in from either end.  Rather than adding wheels, we found four of these felt sliders.  They are self-adhesive and also cover the screws so they don't gauge the floor.


Flip the trundle right-side up and attach two handles to the trundle then go ahead and add the slats. We screwed in the two end slats as well for extra support. Put the mattresses on and slide the trundle underneath the daybed.


Your trundle is complete.  You can leave it like this if you want, all clean lines and simplicity.  But I was hoping to make this into a comfortable spot to curl up with a book on a lazy weekend afternoon (which never seems to materialize).


Getting that comfy upholstered look starts with - duh - upholstery foam.  This piece was about 1" thick.  We wrapped it around each end and secured it with heavy-duty thread in several places.  Then we made slipcovers for each end out of royal blue duck cloth.


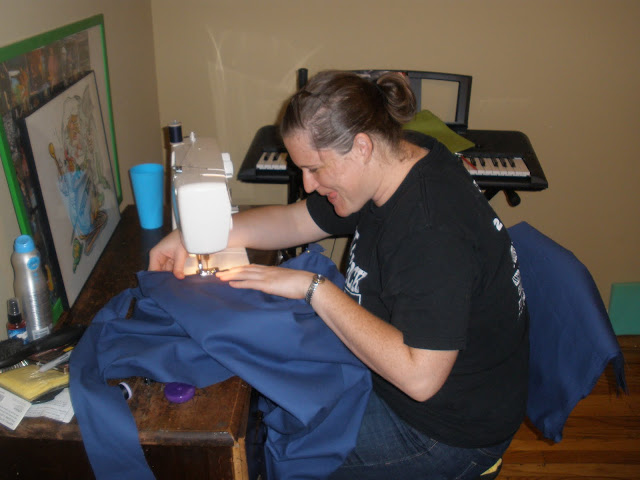
This is my intense sewing face (except I'm mostly laughing).  The exact dimensions are going to depend on how thick your foam is.  We put in a gusset but you could go even simpler and just run a seam up each side. The slip cover should be snug and compress the foam slightly.


Upholstering made a huge difference.  Geoff does all his class reading there, when the cat hasn't already claimed it.  And the best part is that when we move in a few years, it will all come back apart into small, easy to pack pieces.  I was a bit concerned at first because the spartan frame looked a little flimsy, but this thing is so sturdy.  I LOVE IT!!!


Cost:
  • 2 Fjellse twin beds: 2 x $40 = $80
  • 2 Sultan Lade slatted bed base: 2 x $10 = $20
  • 2 matresses (with Groupon): $110
  • 1 yard 60" wide duck cloth: $10
  • 1" x 60" x 36" piece of foam: $25
  • Super Sliders: $5
  • Total: $250

Monday, August 8, 2011

Boxy Button-Down Refashion


I'm introducing a new blog series today: Make Do and Mend Mondays.  Inspired by the WWII slogan, I'm trying to remake things I already have instead of throwing them out and buying new.  I have always had a problem throwing out things that are usable - so much so that I moved a box of clothes I don't wear anymore with us from Pennsylvania because I was convinced I would remake them.  The first in what I hope will be a biweekly series is a simple remake of a long-sleeved tunic length button down that I bought when I was about 30 pounds heavier than I am now.

This shirt makes me sad.
It was too long and boxy and perhaps most importantly, is long-sleeved, which I find pretty uncomfortable most of the time here in south Texas.  I have always had a difficult relationship with button-down shirts.  I like them, but being about a size and a half bigger at my bust than my waist means they frequently aren't flattering.  Luckily, taking in the sides and shortening the length were not particularly difficult.  I do recommend starting by basting the sides and hem to make sure they are where you want them before you cut anything.  Measure twice, cut once!  I redid the sleeves a few times before I got the cuff and the length just right.

This shirt makes me happy.
I ended up taking six inches of fabric away from the waist and I think it looks so much better.  So the pink shirt is done, next I'll attack the grey one. Stay tuned in a couple weeks for a much larger scale Make Do and Mend project!

Related Posts Plugin for WordPress, Blogger...

ShareThis